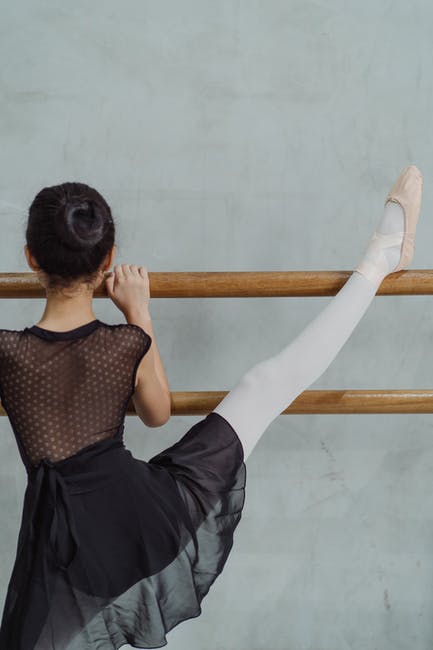
Is your child starting their first day at ballet class but you don’t know how to create the perfect ballet bun?
Creating that picturesque bun is a skill that takes some practice. It seems intimidating at first, but you’ll soon get the hang of it. One of the best ways to prepare yourself is to learn from a tutorial.
That’s why we’ve put together a ballet bun tutorial so that you’re able to get the results you want. Keep reading to learn more!
Long Hair Ballet Bun Process
Longer hair tends to be easier to deal with because there’s more hair with which to work. No matter how long your child’s hair is, however, they’ll still start to get fussy if you take too long. Here’s how to achieve pretty ballet hairstyles in no time at all!
Materials
First, you’ll want to prepare. There are a few things you’ll need to streamline the bun-making process. These things include:
- A hairbrush
- Hair tie
- Bobby pins
- Hairnet
- Spray bottle filled with water
- U-shaped hairpins
It’s possible to get a nice bun without anything special, but these items make it a lot easier. To create a seamless look, make sure to find pins and hair nets that are as similar to your child’s hair color as possible.
Brush Away the Knots
Once you have everything set up, it’s time to brush your child’s hair. You want to ensure all of the knots are gone from the strands or else they’ll cause flyaways and bumps in the bun.
Since the classic ballet hairstyle is a smooth and elegant bun, it’s best to start with hair that’s been thoroughly brushed. If you’re looking to speed up the process, have your child brush their own hair while you set up everything else.
Gather Into a Ponytail
Next, gather all of the hair into a ponytail and secure it with a hair tie. You want to make sure that the ponytail doesn’t sit too high or too low on your child’s head.
A good strategy is to create a diagonal line guided by your child’s ears and chin. The ponytail sits at the top of this line, in the center of their head. Use their ears to help find the center part of the head so that the ponytail doesn’t go too far to the left or right.
Dampen
Now it’s time to spritz the hair with some water from your spray bottle. This helps make the hair easier to work with and it guides those flyaways into place without needing to use any hair spray.
You don’t want to wet the hair too much. A couple of sprays should be enough to slick the hair without making it dripping wet.
Twist and Pin
Now all that’s left to do is take the ponytail and twist it into a tight coil. Then, holding it secure in your hands, wrap this coil around the base of the ponytail and hair tie. This creates the bun with little effort.
Hold the bun in place as you secure the bun with the u-shaped and bobby pins. Use as many as it takes to keep the bun in place.
The last thing to do is to wrap the hairnet around the bun and add another pin or two to secure it. With this gorgeous hairstyle, your child will never have any problems with expressing their creativity through dance!
Short Hair Ballet Bun Process
Short hair appears more intimidating than longer hair, but it’s easy to figure out. The process is very similar to the long hair process, which means you’ll know what to do even if your child changes the length of their hair.
Materials
The materials for short hair are much the same as long hair. The main difference is that you might need a couple of extra pins since you’ll be using more of them, depending on the length of your child’s hair.
A hair parting comb also comes in handy!
Create Two Sections
First, you’ll want to brush your child’s hair, the same as the long hair process. Then, it’s time to gather the hair into a ponytail, but this is where the biggest difference comes into play.
Instead of gathering all of the hair into a ponytail, you’ll want to first divide your child’s hair into two sections. Your objective is to create a half-ponytail, gathering as much of the hair as you can into the ponytail. It’s okay if sections of hair aren’t able to stay within the hair tie since you’ll deal with them in the next step.q
Use a pin to keep this half-ponytail out of your way as you move on to the next step.
Half Pinned and Half Bun
Since the lower section of hair won’t be able to wrap around to make a bun, you’ll want to pin all of that hair up. To make it look neat, divide this lower section into two parts. Then gather each of these new sections and twist as if you were to make a bun, but pin them flat against your child’s head instead.
It’s no problem if there are parts of the hair that stick up at the top of the twist.
Once you have the bottom hairs secured, create a bun with the half-ponytail the same way you would with long hair. The bun will sit over the tops of the lower pinned sections so that no one will be able to see any hairs pointing up.
Secure the bun with a hairnet and capture any flyaways with a few more well-placed pins. Your child’s now ready for the stage!
Ballet Bun Hairstyles Keep Your Child Focused on the Dance
It’s important to have the right style of ballet bun for your child during every practice and recital. Not only does it give a professional aesthetic, but it also ensures your child stays focused on the physical activity. There’s nothing quite as annoying as dealing with flyaway hairs when trying to perform.
By learning how to do a ballet bun, your child gets to enjoy dancing without any distractions!
Looking for the best ballet classes? Check out our wide variety of dance classes to get started!


